 MENU
MENU


×
NOTE!
Click on MENU to Browse between Subjects...
Advertisement
17CSL57
COMPUTER NETWORK LABORATORY
[As per Choice Based Credit System (CBCS) scheme]
(Effective from the academic year 2017-2018)
SEMESTER - V
This Page Provides Program & Output.
Program 3
Program 3
Implement an Ethernet LAN using n nodes and set multiple traffic nodes and plot
congestion window for different source / destination.
Advertisement
3.tcl
1 2 3 4 5 6 7 8 9 10 11 12 13 14 15 16 17 18 19 20 21 22 23 24 25 26 27 28 29 30 31 32 33 34 35 36 37 38 39 40 41 42 43 44 45 46 47 48 49 50 51 52 53 54 55 56 57 58 59 60 61 62 63 64 65 66 67 68 69 70 71 72 73 74 75 76 77 78 79 80 81 82 83 84 85 86 87 88 89 90 91 92 93 94 95 96 97 98 99 100 101 102 103 104 105 106 107 108 109 110 111 112 113 | set val(stop) 10.0 ;# time of simulation end #=================================== # Initialization #=================================== #Create a ns simulator set ns [new Simulator] #Open the NS trace file set tracefile [open 5.tr w] $ns trace-all $tracefile #Open the NAM trace file set namfile [open 5.nam w] $ns namtrace-all $namfile #add manually set wf0 [open WinFile0 w] set wf1 [open WinFile1 w] proc PlotWindow {tcpSource file} { global ns set time 0.1 set now [$ns now] set cwnd [$tcpSource set cwnd_] puts $file "$now $cwnd" $ns at [expr $now+$time] "PlotWindow $tcpSource $file" } #end #=================================== # Nodes Definition #=================================== #Create 6 nodes set n0 [$ns node] set n1 [$ns node] set n2 [$ns node] set n3 [$ns node] set n4 [$ns node] set n5 [$ns node] $n0 label "Source0" $n1 label "Source1" $n2 label "R1" $n3 label "R2" $n4 label "Dest0" $n5 label "Dest1" $ns color 1 "red" $ns color 2 "green" $ns color 3 "blue" $ns color 4 "orange" #=================================== # Links Definition #=================================== #add manually set lan [$ns newLan "$n0 $n1 $n2" 0.5Mb 40ms LL Queue/DropTail MAC/802_3 Channel] $ns duplex-link $n2 $n3 10Mb 100ms DropTail $ns duplex-link-op $n2 $n3 queuePos 0.5 set lan [$ns newLan "$n3 $n4 $n5" 0.5Mb 40ms LL Queue/DropTail MAC/802_3 Channel] set loss_module [new ErrorModel] $loss_module ranvar [new RandomVariable/Uniform] $loss_module drop-target [new Agent/Null] $ns lossmodel $loss_module $n2 $n3 #end #=================================== # Agents Definition #=================================== #Setup a TCP connection set tcp0 [new Agent/TCP] $ns attach-agent $n0 $tcp0 set sink2 [new Agent/TCPSink] $ns attach-agent $n4 $sink2 $ns connect $tcp0 $sink2 $tcp0 set packetSize_ 1500 #Setup a TCP connection set tcp1 [new Agent/TCP] $ns attach-agent $n1 $tcp1 set sink3 [new Agent/TCPSink] $ns attach-agent $n5 $sink3 $ns connect $tcp1 $sink3 $tcp1 set packetSize_ 1500 #=================================== # Applications Definition #=================================== #Setup a FTP Application over TCP connection set ftp0 [new Application/FTP] $ftp0 attach-agent $tcp0 $ns at 0.1 "$ftp0 start" $ns at 9.8 "$ftp0 stop" #Setup a FTP Application over TCP connection set ftp1 [new Application/FTP] $ftp1 attach-agent $tcp1 $ns at 1 "$ftp1 start" $ns at 9.9 "$ftp1 stop" #add manually $ns at 0.1 "PlotWindow $tcp0 $wf0" $ns at 0.5 "PlotWindow $tcp1 $wf1" $tcp0 set class_ 1 $tcp1 set class_ 2 #end #=================================== # Termination #=================================== #Define a 'finish' procedure proc finish {} { global ns tracefile namfile $ns flush-trace close $tracefile close $namfile exec nam 5.nam & exec xgraph WinFile0 WinFile1 & exit 0 } $ns at $val(stop) "$ns nam-end-wireless $val(stop)" $ns at $val(stop) "finish" $ns at $val(stop) "puts \"done\" ; $ns halt" $ns run |
Process to Execute the Program
Step 1: We need to have ns2 pre installed
Step 2: Head to Cmd
Step 3: Navigate to file saved using cd & ls command
Step 4: ns 3.tcl
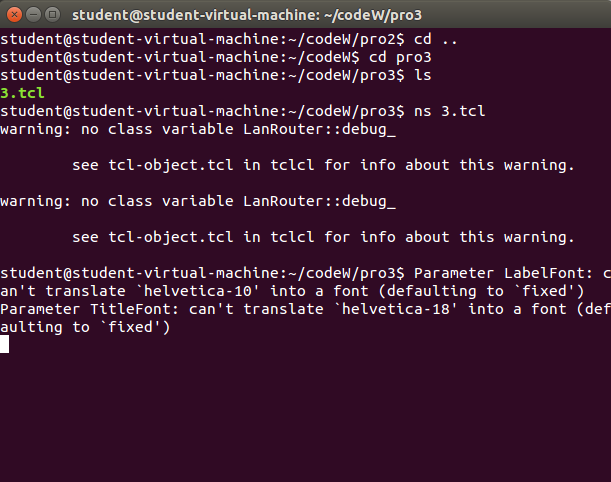
Fig 3.1: Output .
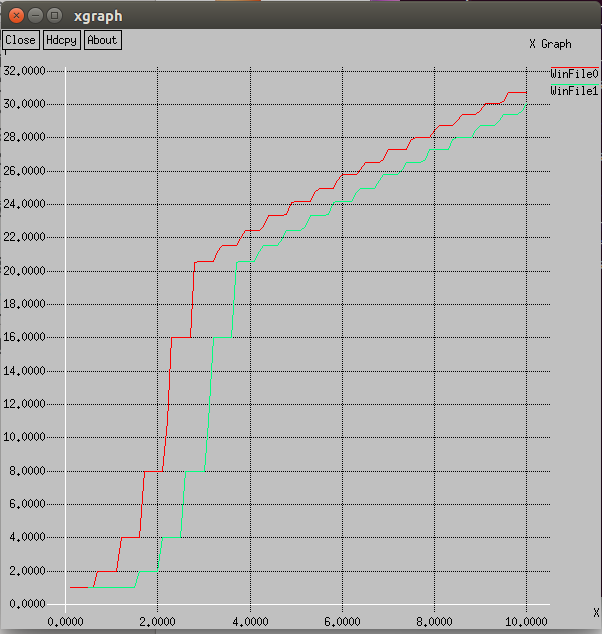
Fig 3.2: Output .

Fig 3.3: Output .
Step 5: Check the output.
×
Note
Please Share the website link with Your Friends and known Students...
-ADMIN
-ADMIN
×
Note
Page Number is specified to navigate between Pages...
T = Text book
QB = Question Bank
AS = Answer Script
-ADMIN
T = Text book
QB = Question Bank
AS = Answer Script
-ADMIN