 MENU
MENU


17CSL57
COMPUTER NETWORK LABORATORY
[As per Choice Based Credit System (CBCS) scheme]
(Effective from the academic year 2017-2018)
SEMESTER - V
This Page Provides Program & Output.
Program 7
Program 7
Write a program for error detecting code using CRC-CCITT (16- bits).
Introduction
CRC or Cyclic Redundancy Check is a method of detecting accidental changes/errors in communication channel.
CRC uses Generator Polynomial which is available on both sender and receiver side.
CRC calculations are used in all types of communications. All packets sent over a network connection are checked with a CRC. Also each data block on your hard disk has a CRC value attached to it. Modern computer world cannot do without these CRC calculations.
Error detection with CRC
Consider a message represented by the polynomial M(x)
Consider a generating polynomial G(x)
This is used to generate a CRC = C(x) to be appended to M(x).
Note this G(x) is prime.
CRC - CCITT uses
X16 + X12 + X5 + 1
Which is equivalent to
1x16 + 0x15 + 0x14 + 0x13
+ 1x12 + 0x11 + 0x10 + 0x9
+ 0x8 + 0x7 + 0x6 + 1x5
+ 0x4 + 0x3 + 0x2 + 0x1 + 1
Which is equivalent to
10001000000100001
PRO7.java
1 2 3 4 5 6 7 8 9 10 11 12 13 14 15 16 17 18 19 20 21 22 23 24 25 26 27 28 29 30 31 32 33 34 35 36 37 38 39 40 41 42 43 44 45 46 47 48 49 50 51 52 53 54 55 56 57 58 59 60 61 62 63 64 65 66 67 68 69 70 71 72 73 74 | import java.util.*; class PRO7 { void div(int a[],int k) { int gp[]={1,0,0,0,1,0,0,0,0,0,0,1,0,0,0,0,1}; //generating polynomial = X^16 + x^12 + x^5 + 1 int count=0; for(int i=0;i<k;i++) { if(a[i]==gp[0]) { for(int j=i;j<17+i;j++) { a[j]=a[j]^gp[count++]; } count=0; } } } public static void main(String args[]) { int a[]=new int[50]; int b[]=new int[50]; int len,k; PRO7 ob=new PRO7(); //creating an object of class PRO7 System.out.println("Enter the length of Data Frame:"); Scanner scan=new Scanner(System.in); //Creating an object to invoke Scanner Function to read objects len=scan.nextInt(); //reads the lenth of Data or Message to be sent int flag=0; //indication for the data generated and received are same or not. System.out.println("Enter the Message:"); for(int i=0;i<len;i++) //iteration to accept input (the data / Message). { a[i]=scan.nextInt(); } for(int i=0;i<16;i++) //adding zeros to the string { a[len++]=0; } k=len-16; //retreieving the original data word length for(int i=0;i<len;i++) //copying the original Data word into an array b. { b[i]=a[i]; } ob.div(a,k); //calling an function to use CRC-CCITT 16 bits for(int i=0;i<len;i++) a[i]=a[i]^b[i]; //produces data transmion bits System.out.println("Data to be transmitted: "); //prints data to be transmitted for(int i=0;i<len;i++) { System.out.print(a[i]+" "); } System.out.println(); System.out.println("Enter the Reveived Data: "); //Prompt enter the data received for(int i=0;i<len;i++) { a[i]=scan.nextInt(); } ob.div(a, k); //checkes with CRC-CCITT 16 bit. "Note not compare " for(int i=0;i<len;i++) { if(a[i]!=0) { flag=1; break; } } if(flag==1) //prints weather received data is correct or not. System.out.println("error in data"); else System.out.println("no error"); } } |
Process to Execute the Program
Step 1: We need to have Java JDK installed, So That Java Programs can Run.
Step 2: Copy & Paste the Below Code of PRO7.java .
Step 3: or simple Download the Source Code.
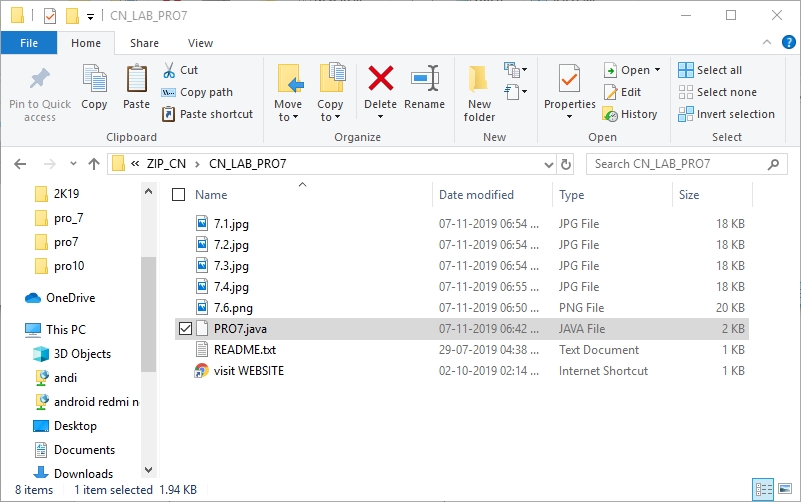
Fig 7.1: Required Files .
Step 5: Navigate to the PRO7.java File location.
Step 6: Use CD & DIR command on cmd to navigate.
Step 7: First Run the PRO7.java => javac PRO7.java
Step 8: => java PRO7
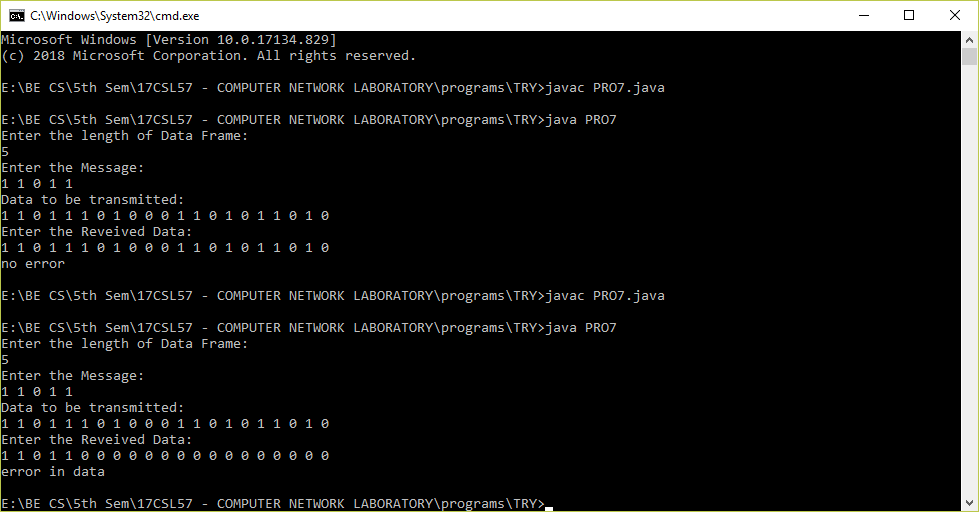
Fig 7.2: Demonstration of PRO7.java .
In my case it is 5
Step 10: Enter the data to be transmitted.
Step 11: The transmitted data will be displayed
Step 12: Now, Enter the Received Data
Step 13: This Displays Either the Received Message is Correct or In-correct.
-ADMIN
T = Text book
QB = Question Bank
AS = Answer Script
-ADMIN